Alright, you’ve decided that it’s time to get a desktop and you’re not too sure whether you should buy a prebuilt desktop or build your own… Despite all the ‘complexity’ that surrounds building your own PC, it’s actually not that hard! And guess what, it’s cheaper, configurable and best of all – customisable. If you can build IKEA furniture and install software, you’re good to go! So what are you waiting for? Dive in to build your PC.
How does it work?
Building a PC just means that you build the desktop yourself by buying the individual parts and assembling them together. Then you connect this desktop to a display(monitor) with some input devices(keyboard and mouse). Some of you might wonder why this is better than just buying a prebuilt PC. There are quite a lot of benefits…
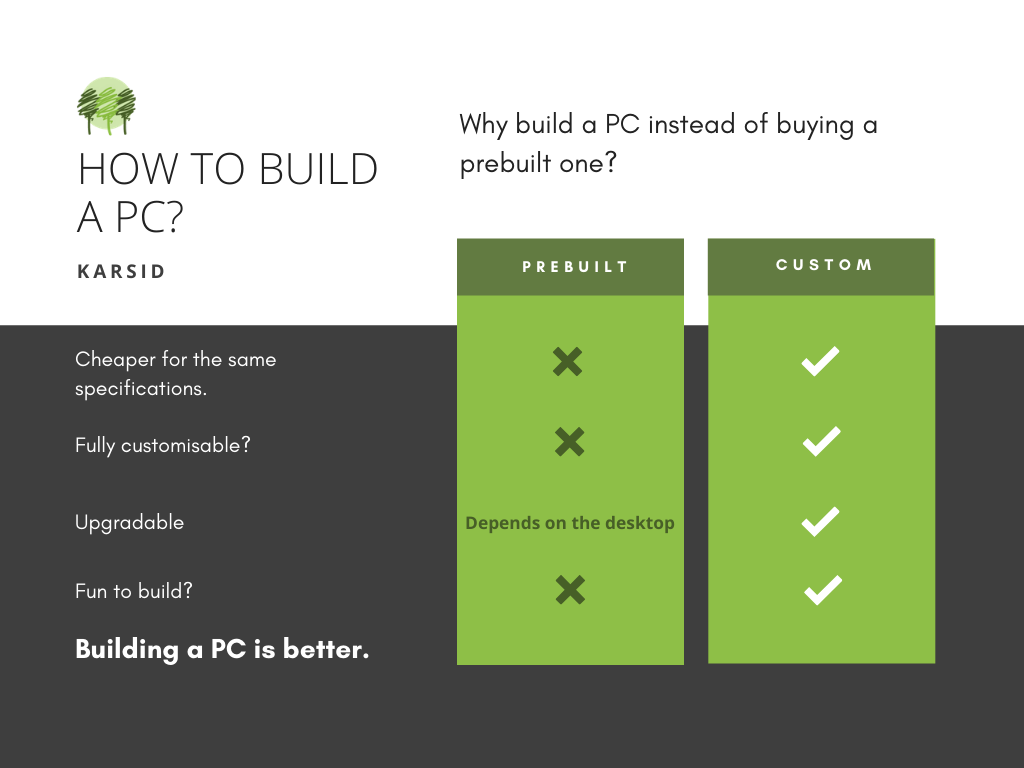
Firstly, what does building a PC involve and how does it even work? Well, there are quite a few stages:
- Planning the desired configuration – This is the very first stage where you plan and decide on the purpose of the build and explore the parts based on the requirements. So if you need to use the desktop mainly for gaming, a good graphics card(more on that later) would be instrumental to the experience.
- Choosing compatible parts – Buying parts doesn’t mean you can buy any parts. You need to buy particular parts which are all compatible with each other. For this, there are plenty of websites and tools to help you check the compatibility, so, don’t panic.
- Buying any accessories and peripherals(keyboard, mouse and headphones) – If you’ve already got a monitor, keyboard and mouse you’re fine for the necessary but, there are a few more parts – which, depending on what you buy/have – may be required. This may include speakers, a webcam and/or cables.
- Assembly – This is the fun part. Just like LEGO, you fit all the parts together and then bring it all to the test.
- Buying OS and installing it – Before you can use the computer, you need to install the OS(Operating System) and set up the machine for use.
- Installing drivers – The last step of the process is installing the drivers to support the parts that you’ve assembled.
What parts do you need?
For this particular build, I have linked all the parts I used to build my PC. If you would like to see all the parts in one document, click here.
Necessary
- Motherboard – Some mobo’s don’t have integrated WiFi or Bluetooth to allow you to use the respective technologies. So, you can buy adapters for WiFi and Bluetooth.
- CPU/Processor
- Case
- RAM
- Storage – In my case, I used an SSD but this is up to you. SSD’s are faster and more robust but more expensive than HDD’s.
- Power Supply
- Graphics Card
- Cooling – In my case, I used fan cooling instead of liquid cooling. Again, this is your decision.
- Monitor
- Keyboard
- Mouse
- OS License Key
Optional
- Webcam
- Speakers
- Headphones
Safety Precautions
You’ve waited a while for the parts to arrive and you’re excited to build it, but before that, ensure you’ve checked the following safety precautions:
- Discharge static – You don’t to want to build up static electricity and then pass it on to the power supply as that could be dangerous.
- Work on a hard floor – On carpets, the pins can be tangled if placed on the carpet. If you have to work on the carpet, don’t wear socks, as you can build up static.
Tools
A Phillips head screwdriver. That’s it!
Building it!
Time to build it!
To make this slightly easier, I have created a diagram of the motherboard so that you can understand which parts connect together. If you are stuck anywhere due to the terminology, you can refer to this diagram to understand what I mean.
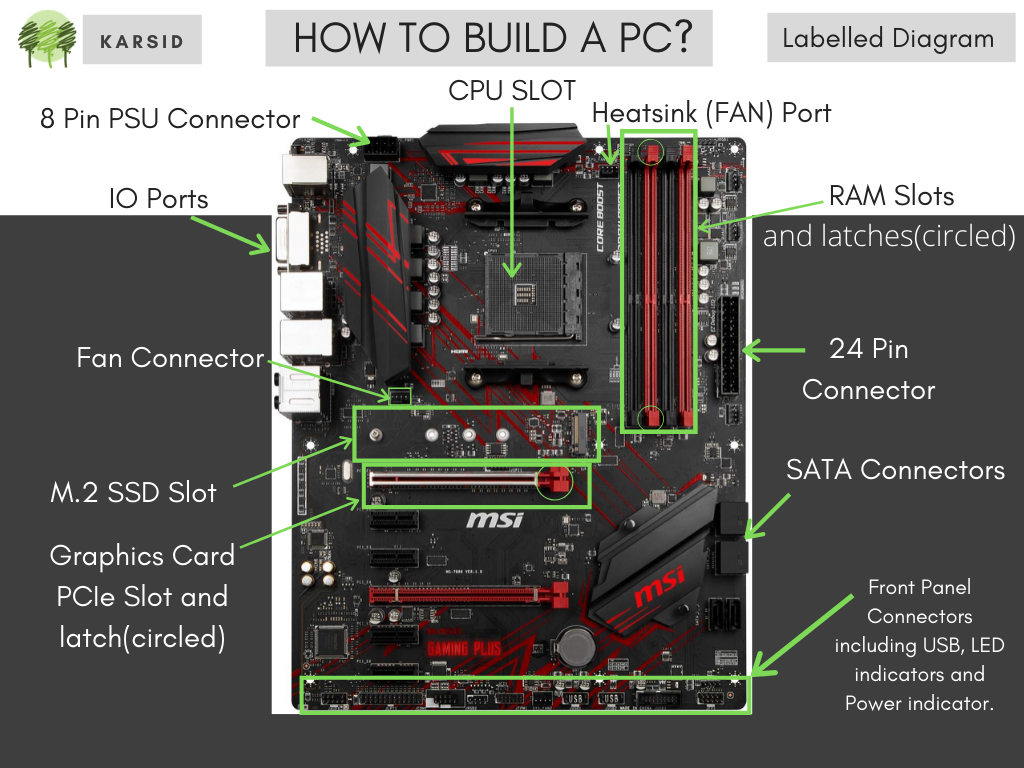
As you’re exploring many PC build guides, you might find different orders for the builds. It doesn’t hugely make a difference and mainly depends on the parts you have.
If you’ve not already, unbox all the equipment and organise them clearly so that you don’t mix anything up. I suggest using small plastic boxes with masking tape to label clearly where the parts are coming from. Cool, first, let’s get that RAM installed!
RAM Installation
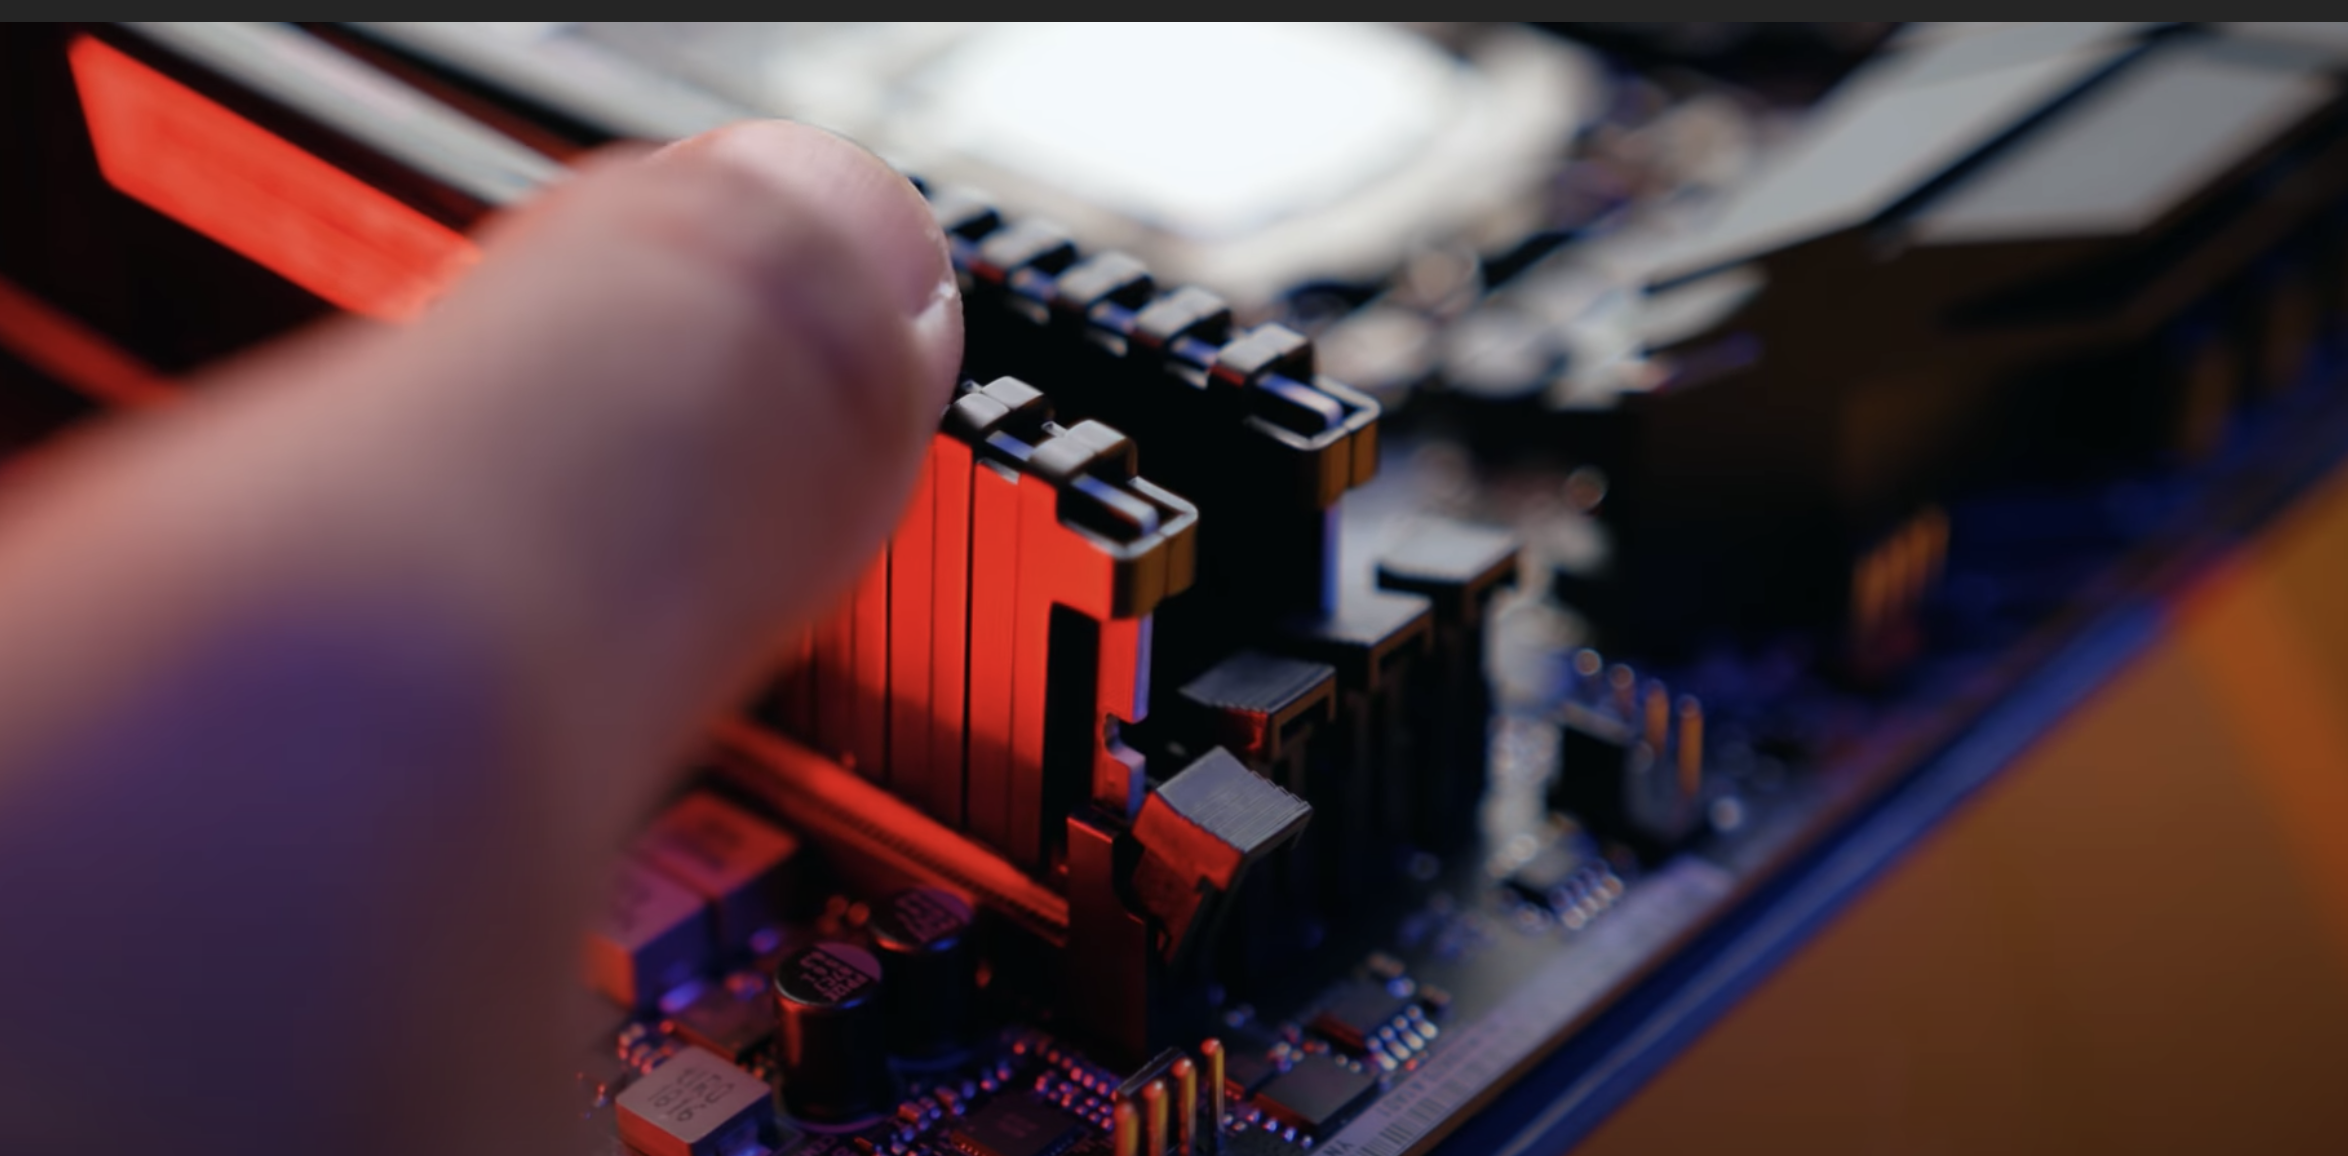
Depending on the motherboard, you’ll have a few slots and you need to make sure that you install the RAM sticks in the correct slots. Some motherboards have 4 RAM slots and generally for these, the 2 RAM slots furthest away from the CPU slot are to be used. Make sure you refer to the manual though just to make sure.
Go ahead and lower the latches on either side of the slot to allow the RAM to be slotted in.
Next, you need to align the RAM notch with the slot. Then, just push it gently until you hear a click. That’s it.
CPU
Next up is the CPU. When you unbox the CPU, make sure that you touch both the included heatsink(fan) and CPU by the edges and nowhere else. Contacting them improperly could lead to failure so try to be careful.
On the motherboard, locate the CPU slot and gently pull the retention arm away from the CPU and up. Then, align the golden triangle in the corner of the CPU with the tiny triangle on the slot and gently move it around and it should fall into place.
Once it’s in, give it a little wobble and if it doesn’t come out, pull the retention arm back into place to lock the CPU in the slot.
CPU Heatsink
Most CPU’s come with a stock heatsink which looks like a fan. Hold it on the edges and just check that the flat side has thermal paste(thin layer of paste to stick onto the CPU). If it doesn’t, you’re going to have to use any included thermal paste or buy one and squeeze out half the size of a pea of thermal paste onto the CPU before installing the heatsink.
Once that’s out of the way, align it so that there is no interference with the RAM slot. Then just screw it into place. That’s the hard part out of the way!
You cannot remove it and readjust it as that would tear away the thermal paste. Try to be careful in the installation the first time.
If you want to see it the installation in action, scroll down to the videos or click here to watch a video on how it works.
The last thing to do is to connect the cable to the CPU fan slot which is labelled on the motherboard.
That’s out of the way and now we can bring this thing into shape! Get the case out and remove the side panels and the front panel.
M.2 SSD
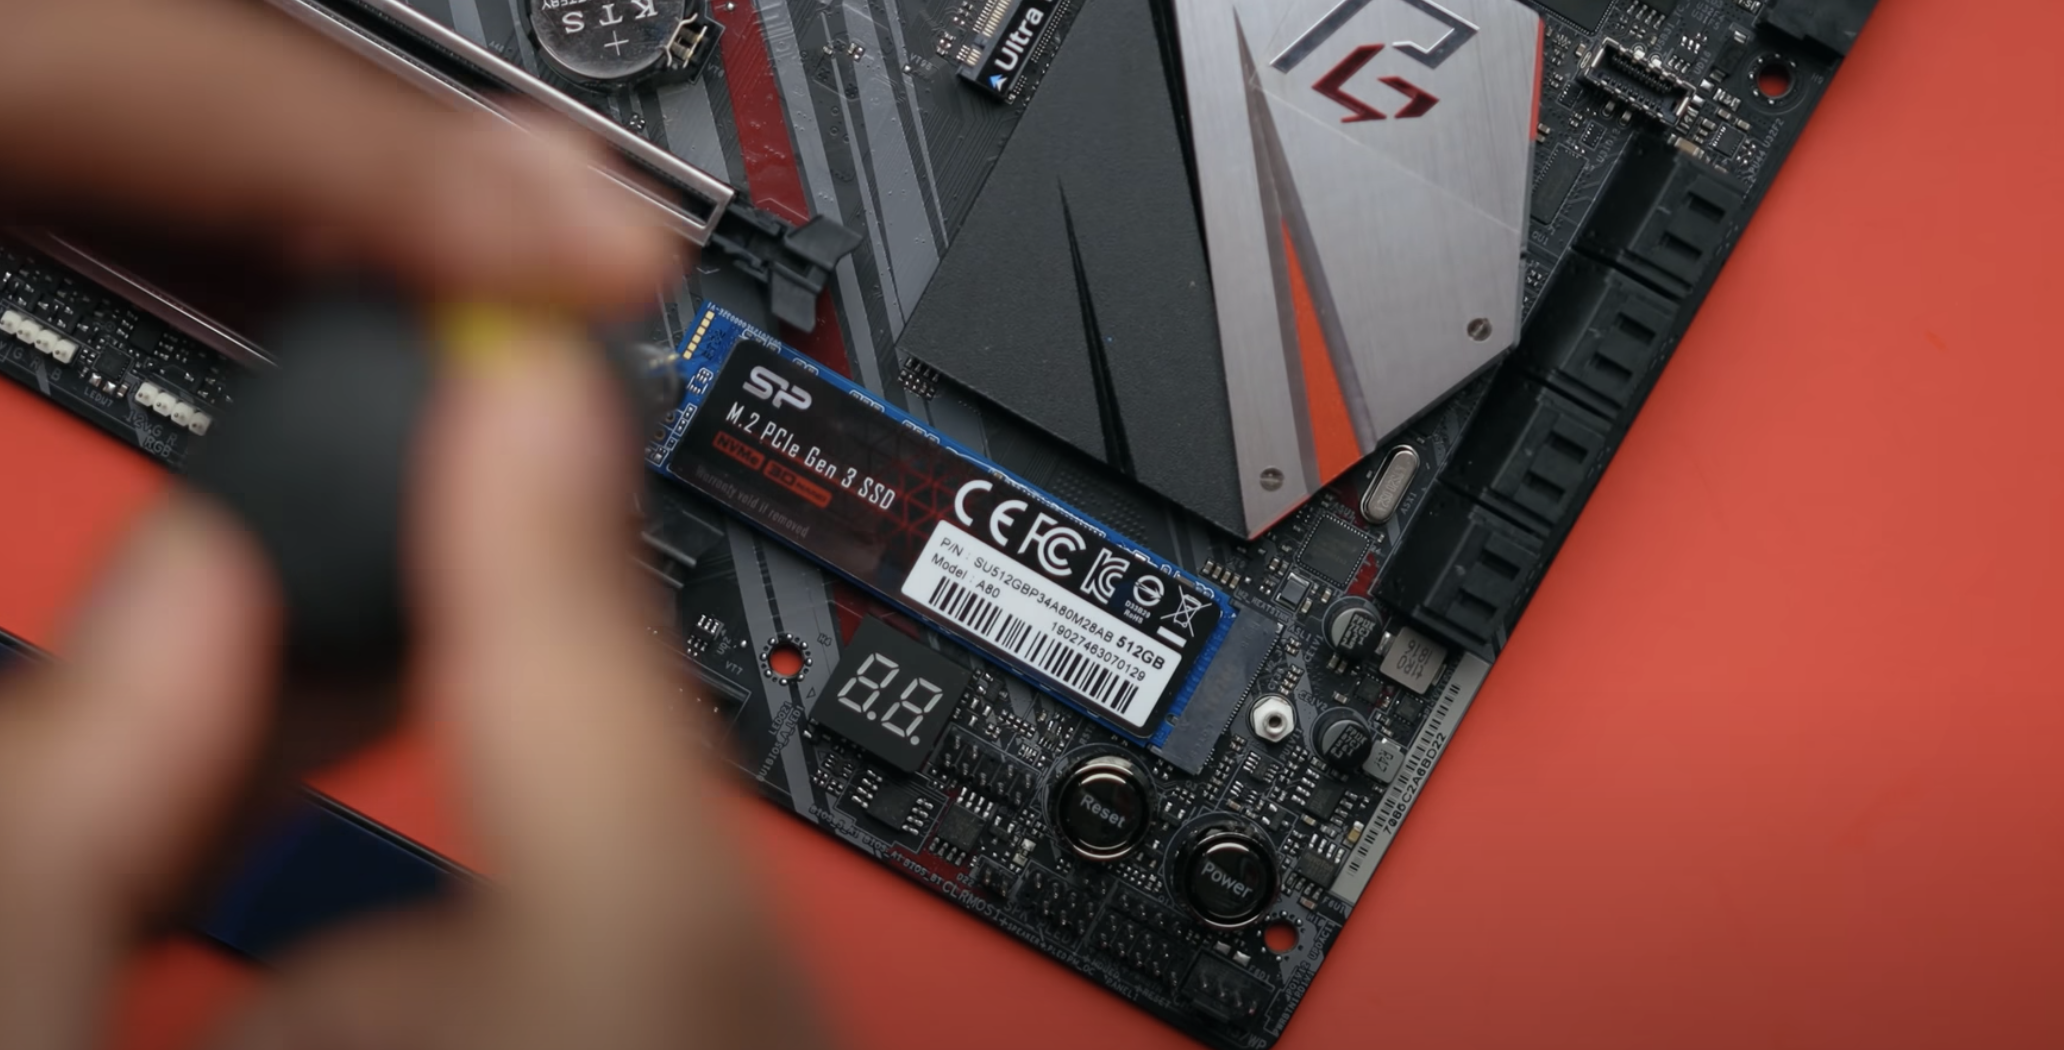
At this point, if you have a PCIe M.2 SSD, you can go ahead and install that. Locate the slot and get the small screw that would be included in the motherboard/its package. Similar to the RAM installation, make sure that the notch aligns and slide it in. Then, gently press it down until it aligns with the screw insert and then tighten the screw. That’s it!
Motherboard
The next step is to get the case flipped onto its side for the motherboard to get in. Before you do though, grab that IO shield included in the motherboard package and fit it into the rectangular cutout in the case making sure that it’s correctly aligned to fit the ports. Apply some force on each corner to click it into its position.
Next, place the motherboard inside the case ensuring that the gaps for the screws line up together. Then, using the screws provided in the case, lock the motherboard into its position.
PSU(Power Supply)
The next step brings in a lot of cables and it can seem overwhelming but here’s where it gets fun. The connections! Before this though, you need to screw the PSU into position…
The PSU slots are generally at the lower backside and you can slide it in from the side. You need to have the open side of the PSU faced downwards(generally) to allow the airflow through the provided airholes in the case. Then, you should be able to screw the 4 corner screws through the case into the power supply to lock it into its position.
PSU’s come in quite a few variations and some require you to plug the connections individually on both sides – from the PSU to the respective component. For other PSU’s, all the connections are already made on one side(PSU) and you just need to wire them into the respective components.
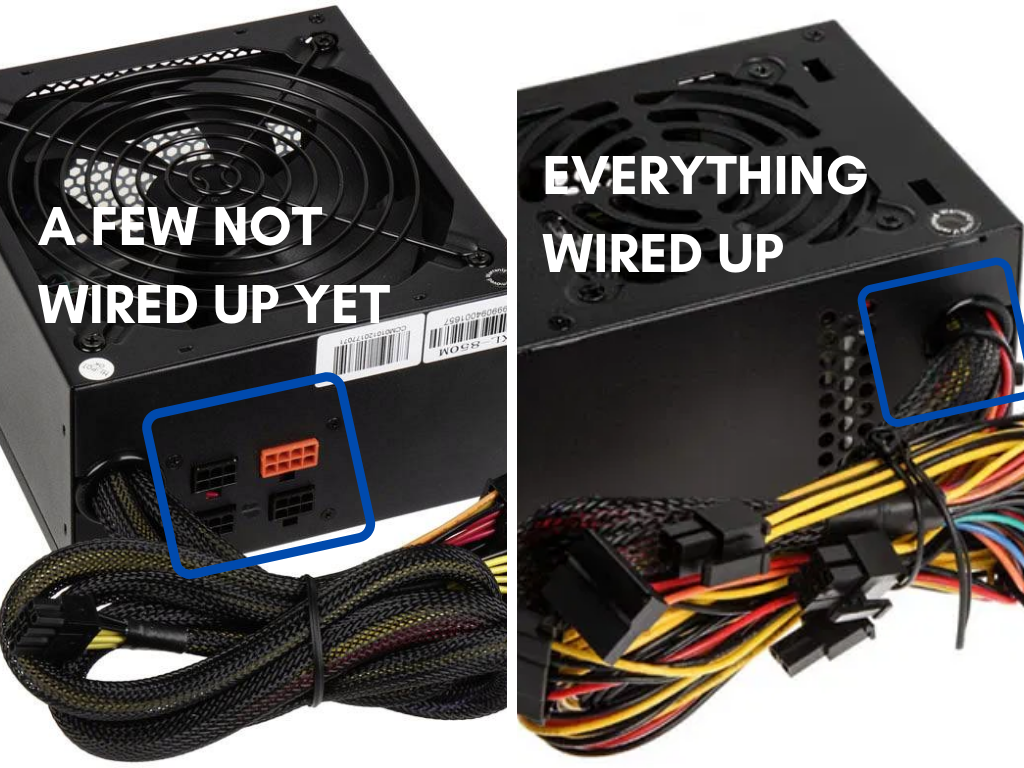
Once this is in, we can make one connection(for now). That’s the big 24 pin connector. You should find a 24 pin connector handily on the right side of the motherboard, so, from the back, make the connection.
Yay! It’s taking good shape!
Graphics Card
Next up, we can install the graphics card! Generally, they’ll come with a lot of connection caps so remove those first and then play around with it to see which orientation it needs to connect it to the motherboard. Typically, the location for the motherboard slot is on the left side under the included case fan. There you’ll find a slot PCIe x16 slot.
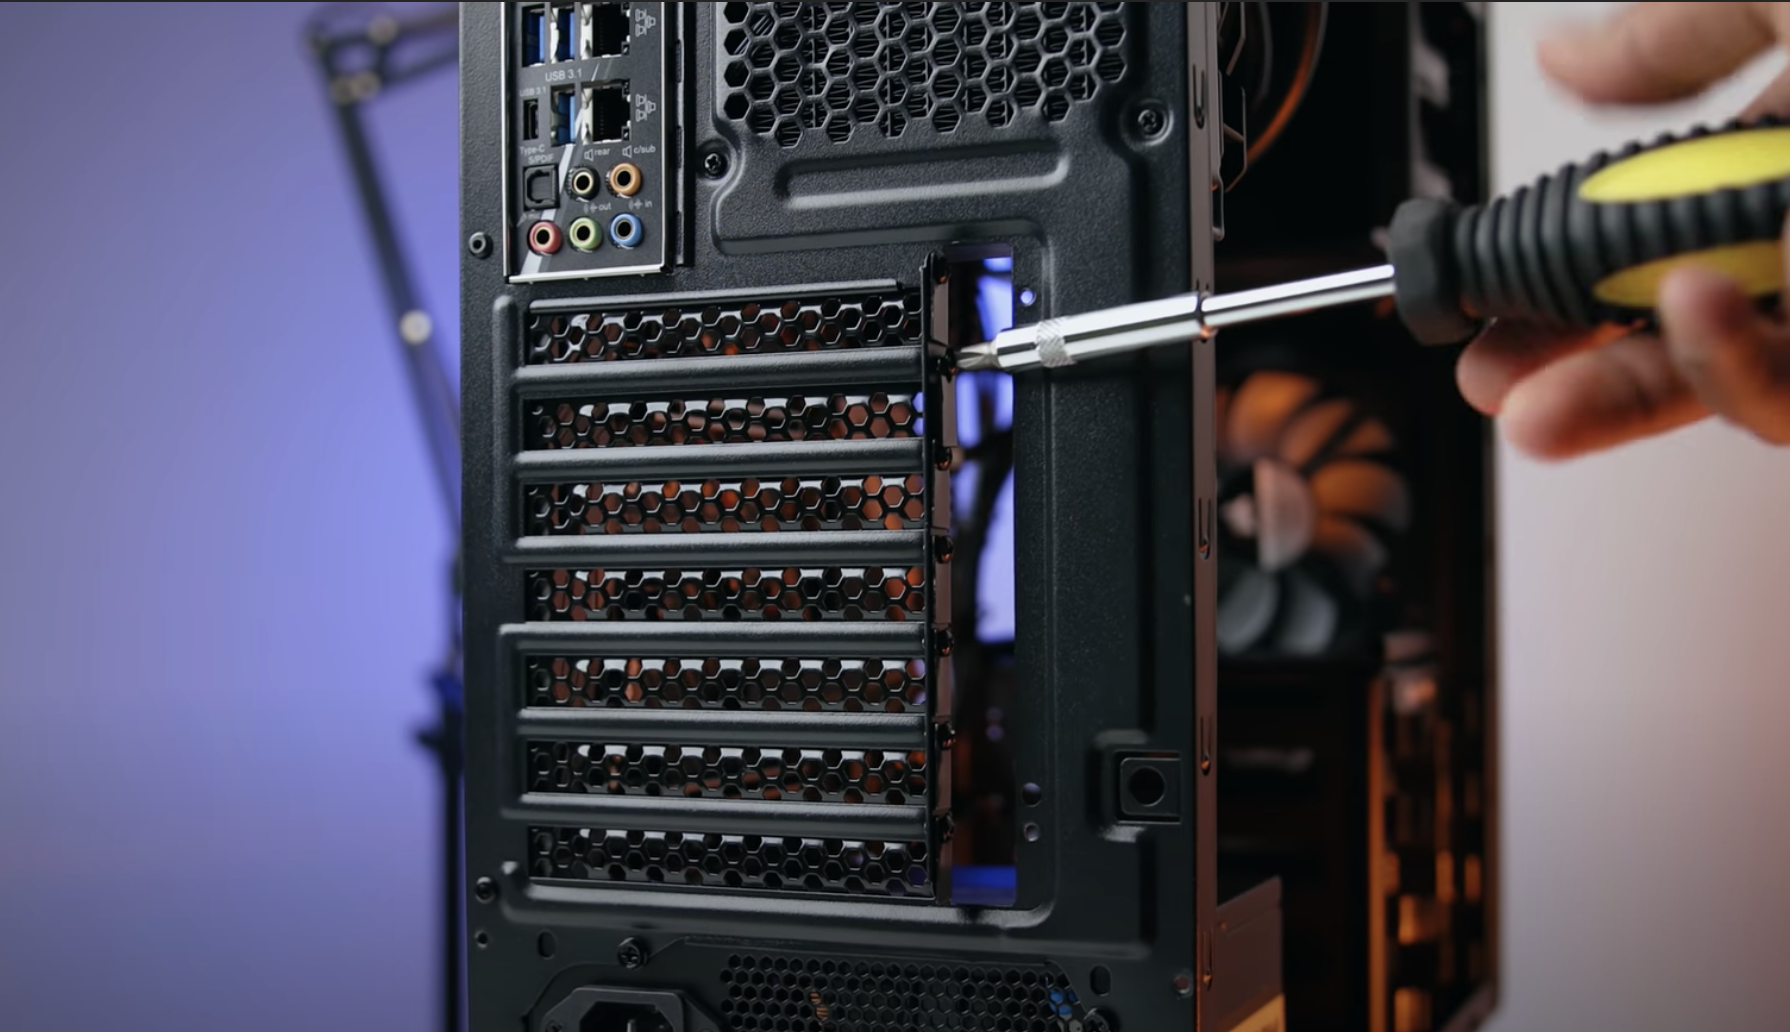
To install, you’ll need to remove a few expansion slots under the included case fan. Once removed. just align the graphics card and slot it in and then screw it into the removed expansion slots.
SATA Storage
If you have a 2.5″ SSD/HDD or a 3.5″ HDD, you need to plug this into the storage space provided in the basement. There should be a few mounting brackets to fit your storage device into. Then you should be able to screw in from the front/back(depending on the case) to lock the device into position. The brackets vary from case to case so refer to the trusty case manual on the installation of the SATA storage.
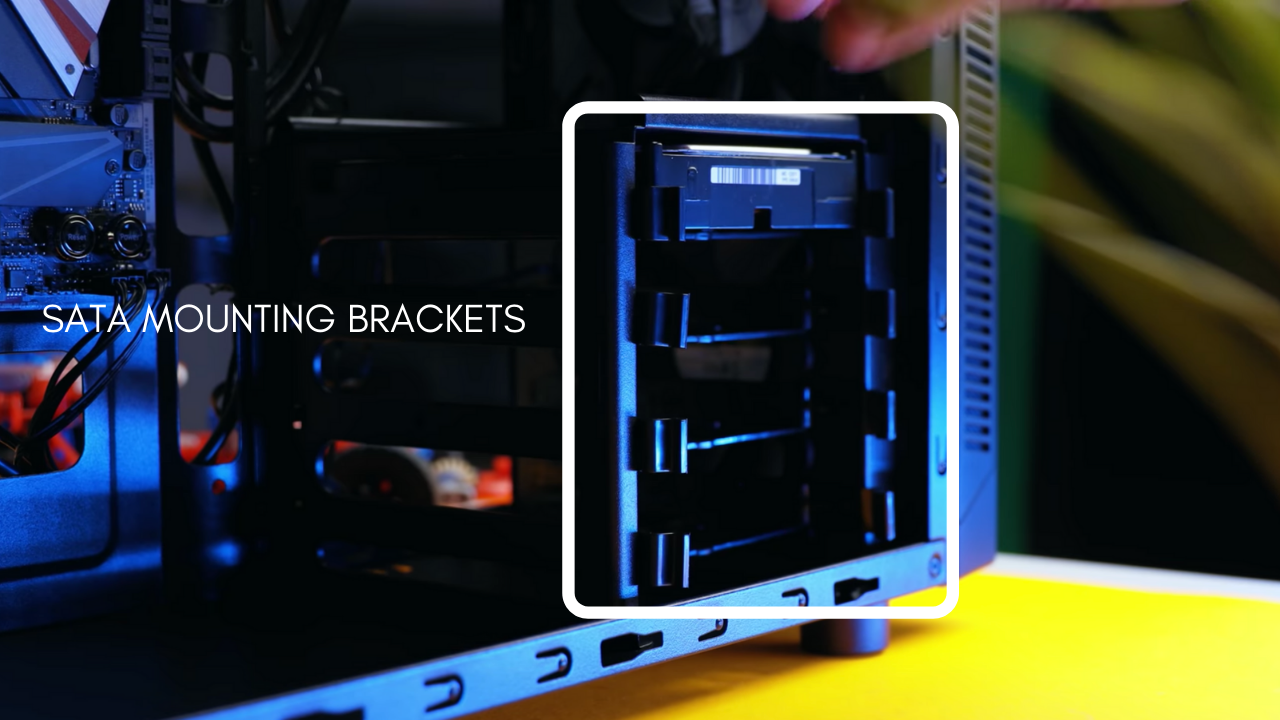
To hook it to the system, you need to make 2 connections.
- SATA Power from the PSU. There should be an elongated ‘L’ shaped cable labelled SATA from the PSU which you can connect to the storage device.
- SATA Data to the Motherboard. You should find a SATA cable in your motherboard which you connect to the storage device by referring to the motherboard. The slot location on the motherboard varies depending on the mobo, however, you should find detailed instructions in video tutorials or manuals.
Fans
Next up is the cooling! Fans are very simple to install but you need to examine the placement to produce the best airflow. The general way to go about this is to push the airflow from the front to the back so ideally, you’d have 2 fans at the front and 1 at the back. If you want to, you can place a fan at the top to suck some air out through the top.
To screw them into place, use the screws included in the case and lock the 4 corners into place.
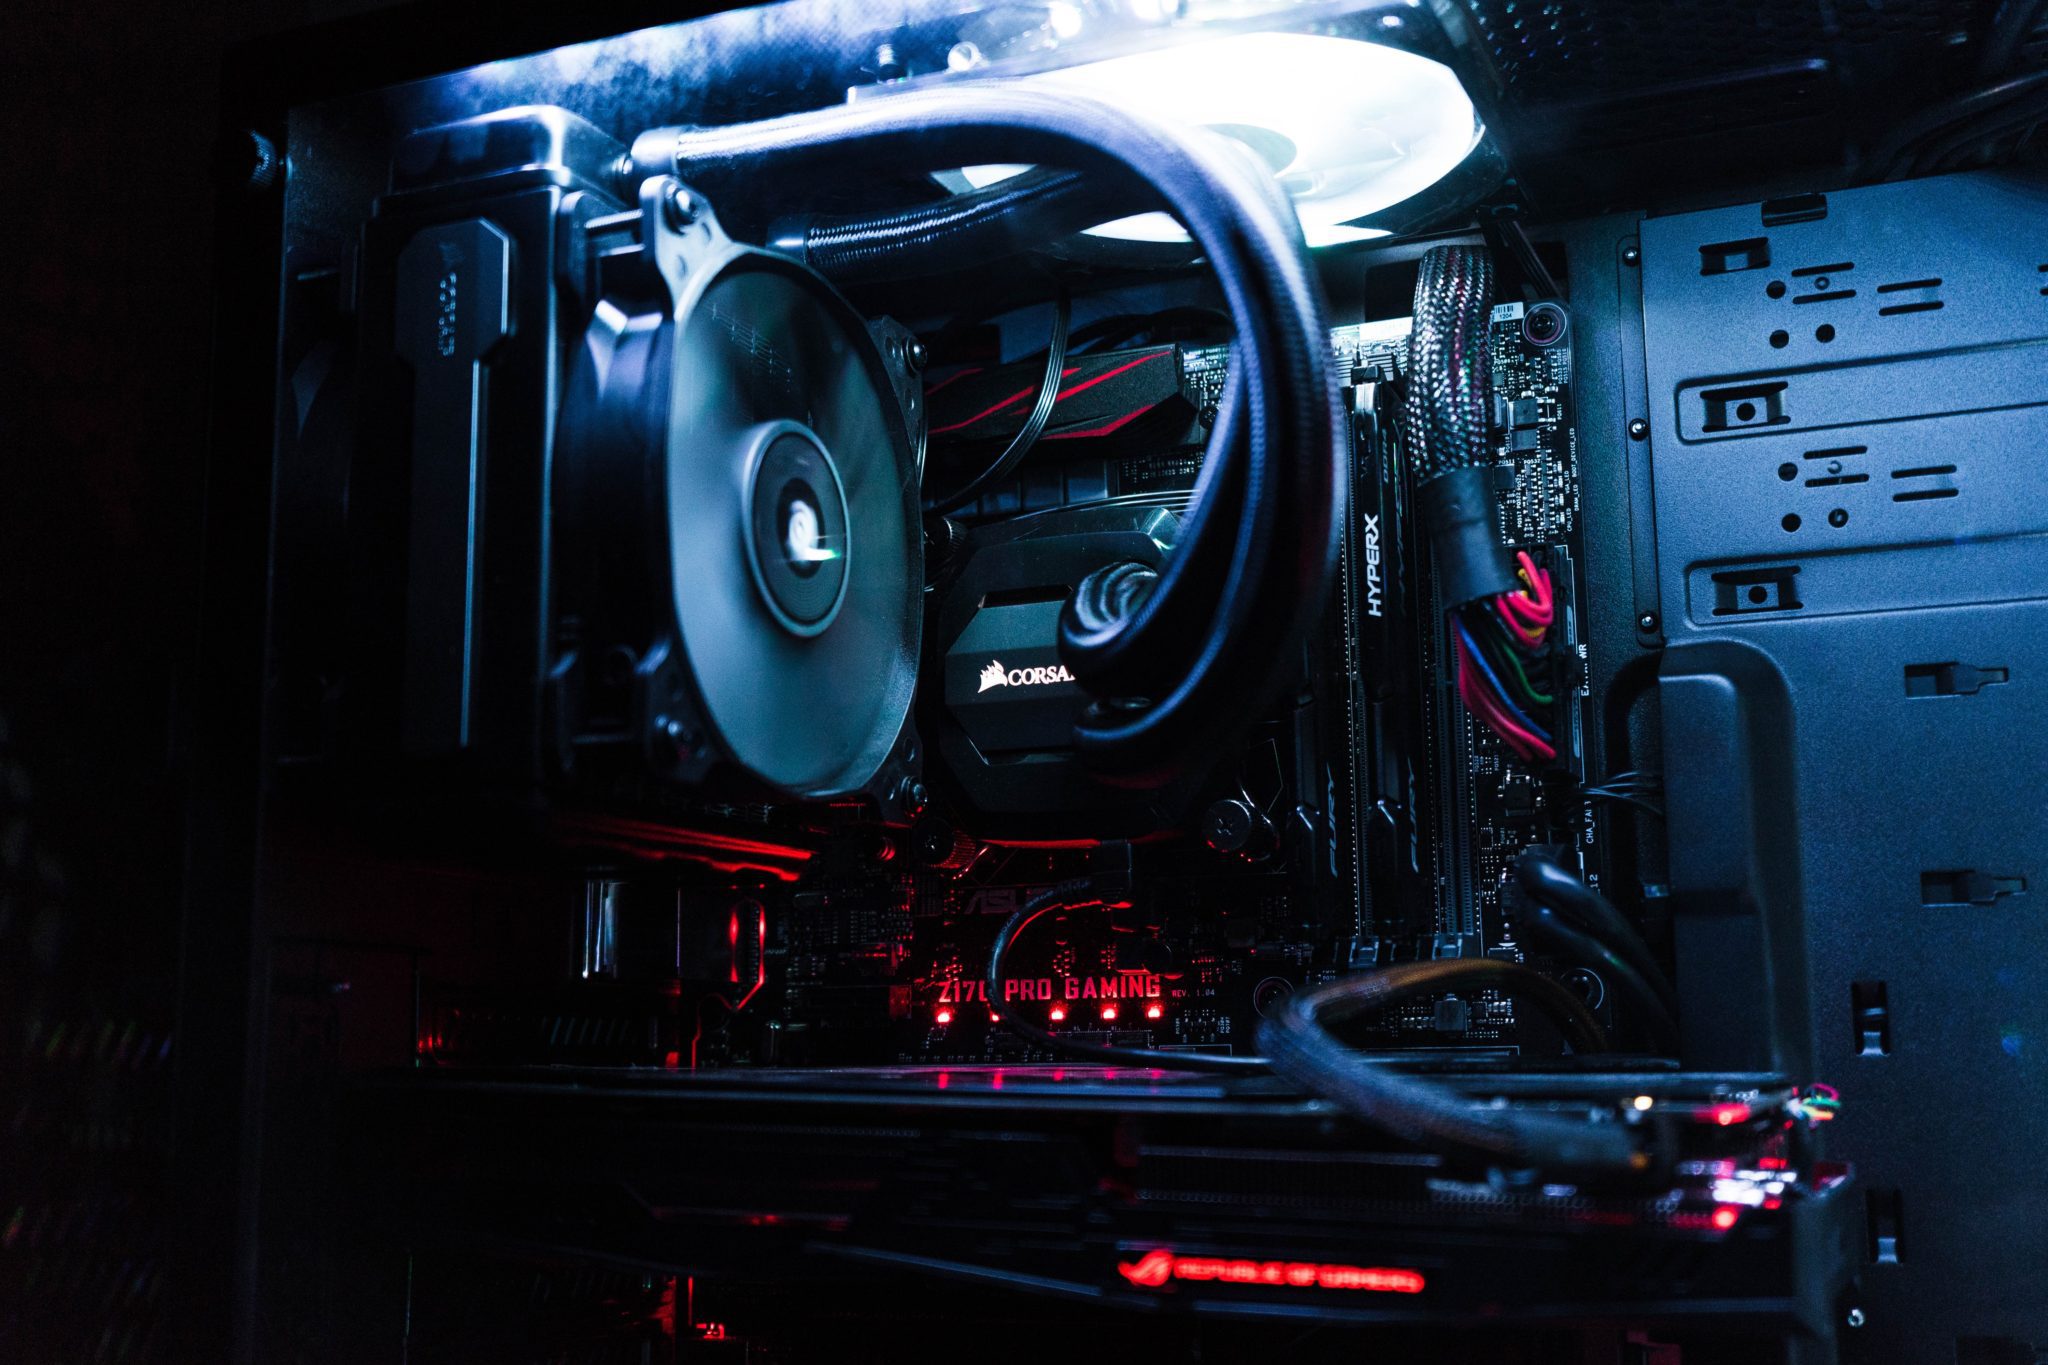
To actually connect them to the motherboard, you need to find the fan slots located around the motherboard with labels to indicate their purpose. Some motherboards, unfortunately, don’t have so many fan slots. This forces you to get a fan splitter which does the job nicely.
Alright, we’re almost done!
Cabling everything together
The first thing we want to do is to plug the 8 pin CPU header(from the PSU) to the connector which is typically located in the top left corner.
Next, we can plug the graphics card to the PSU by connecting the PCIe extension cables to the graphics card slot. Some graphics cards have a cable included bridging the connection. Referring to the manual will clarify things in case you’re dubious.
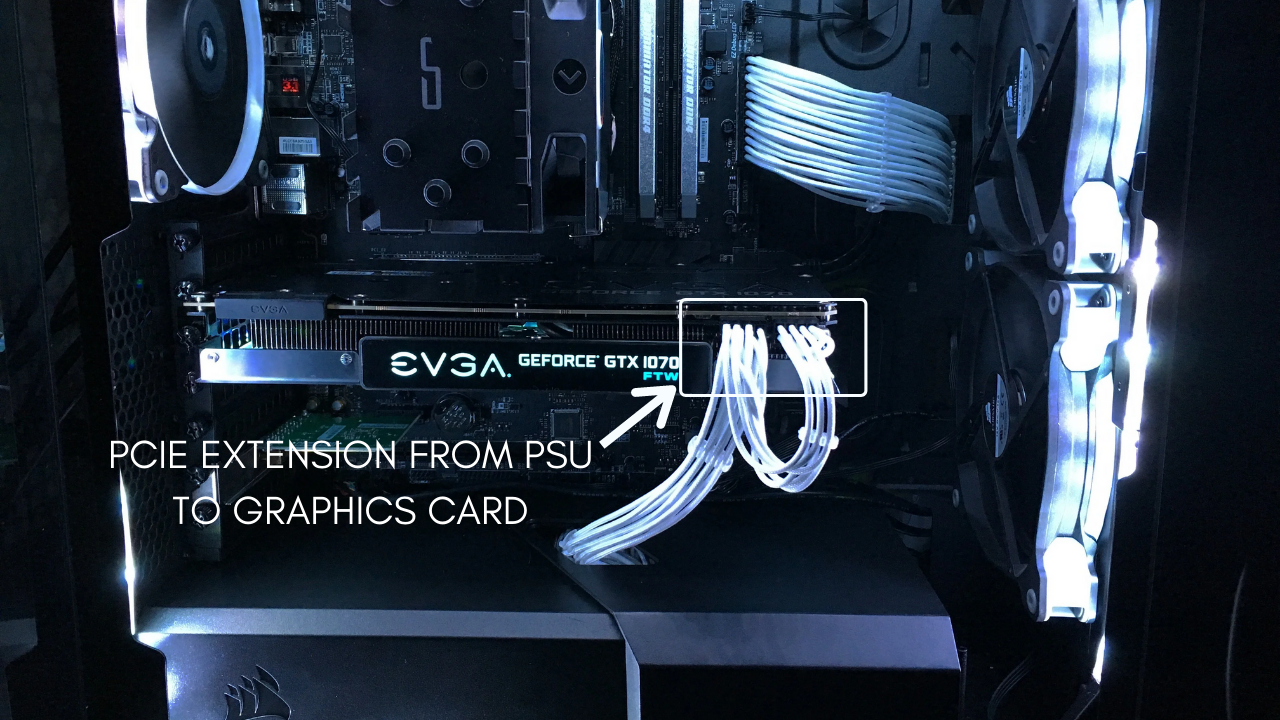
Lastly, we need to connect all the front panel pins to the motherboard. This may include any LED’s, USB connectors and the power indicator. For this stage, as the cases and motherboards vastly vary between builds, I encourage you to consult to the motherboard’s manual to find the pins required to complete the connections.
One thing I can suggest is to be careful with the pins as they can easily bend.
Final Steps of Assembly
You’re probably wondering what to do with the mess of connections… Well, we cable manage them! Using the abundance of cable ties and velcro included, try to route everything in a neat way to organise the cable neatly and tightly so that the panels can go back on. This requires some experimentation and can be difficult but it’s a very exciting process.
Last but not least, we gotta put it to the test! Get the power supply connected to the wall socket and switch it on! Hit the power button and see for yourself the magical machine, that you’ve just spent hours building.
Case it all up and tidy everything away for the finishing touches!
Finishing Touches
This stage doesn’t offer a heap of options as the general public choose either Windows or a preferred Linux OS with the former being the most popular. For installing Windows, you need a laptop/PC and an 8GB USB drive.
At a high level here’s what’s next:
- Navigate to this link and install the Media Creation Tool. Go through the setup wizard and then download the latest BIOS from the motherboard’s website.
- With both things downloaded into the USB, place the USB in the new desktop you built and power it on.
- Confirm everything is functional through the UEFI settings and boot up for OS setup!
- Connect to the internet through an Ethernet cable or a WiFi adapter.
- Download all the drivers for the components to work and enjoy!
As a video walkthrough would be more appropriate for this section, I recommend watching this tutorial to walk you through the entire installation process.
If you need help, ask us in the comment section! We’ll try our best to reach out and help.
Congratulations on building your first PC! Whilst it may have seemed a bit intimidating, it’s certainly fun and super satisfactory when you see it work. Now you can start boosting that productivity of yours or perhaps binge-watch Netflix to relax for a while.
Our PC Build


Leave a Reply